Getting Started
This repository supports one setup path: build natively with go1.24.5-embedded and n64go@v0.1.2. If that native bootstrap is unavailable on your host, use the Linux fallback below.
Installation
- Clone the repository:
git clone https://github.com/drpaneas/gosprite64.git
cd gosprite64
- Install the EmbeddedGo toolchain:
go install github.com/embeddedgo/dl/go1.24.5-embedded@latest
go1.24.5-embedded download
- If macOS aborts with the
__DATA/__DWARFdyld error, retry once with:
BOOT_GO_LDFLAGS=-w go1.24.5-embedded download
- Install
n64go:
go install github.com/clktmr/n64/tools/n64go@v0.1.2
- Build all examples with the supported native-first workflow:
chmod +x ./build_examples.sh
./build_examples.sh
n64.env is the only tracked toolchain configuration file:
GOTOOLCHAIN=go1.24.5-embedded
GOOS=noos
GOARCH=mips64
GOFLAGS='-tags=n64' '-trimpath' '-ldflags=-M=0x00000000:8M -F=0x00000400:8M -stripfn=1'
Cursor / VS Code
If gopls reports embedded/* packages as missing or does not recognize files guarded by //go:build n64, configure the workspace so the editor uses the same build tag and toolchain environment as the terminal.
Create .vscode/settings.json in the repository with:
{
  "go.buildTags": "n64",
  "go.toolsEnvVars": {
    "GOENV": "${workspaceFolder}/n64.env"
  },
  "gopls": {
    "build.buildFlags": ["-tags=n64"],
    "env": {
      "GOENV": "${workspaceFolder}/n64.env"
    }
  }
}
If the Go extension still invokes the wrong go binary for editor actions, add:
"go.alternateTools": {
  "go": "go1.24.5-embedded"
}
After changing the settings, run Go: Restart Language Server or Developer: Reload Window.
GoSprite64 exposes one official fixed resolution and drawing canvas: 288x216 logical pixels. The runtime centers that canvas and handles presentation scaling for you, so gameplay code should not manage borders, safe areas, or video-mode presets directly.
If you want to verify the fixed-resolution presentation visually, run examples/calibration/game.z64 in ares after the build. The expected calibration frame looks like this:
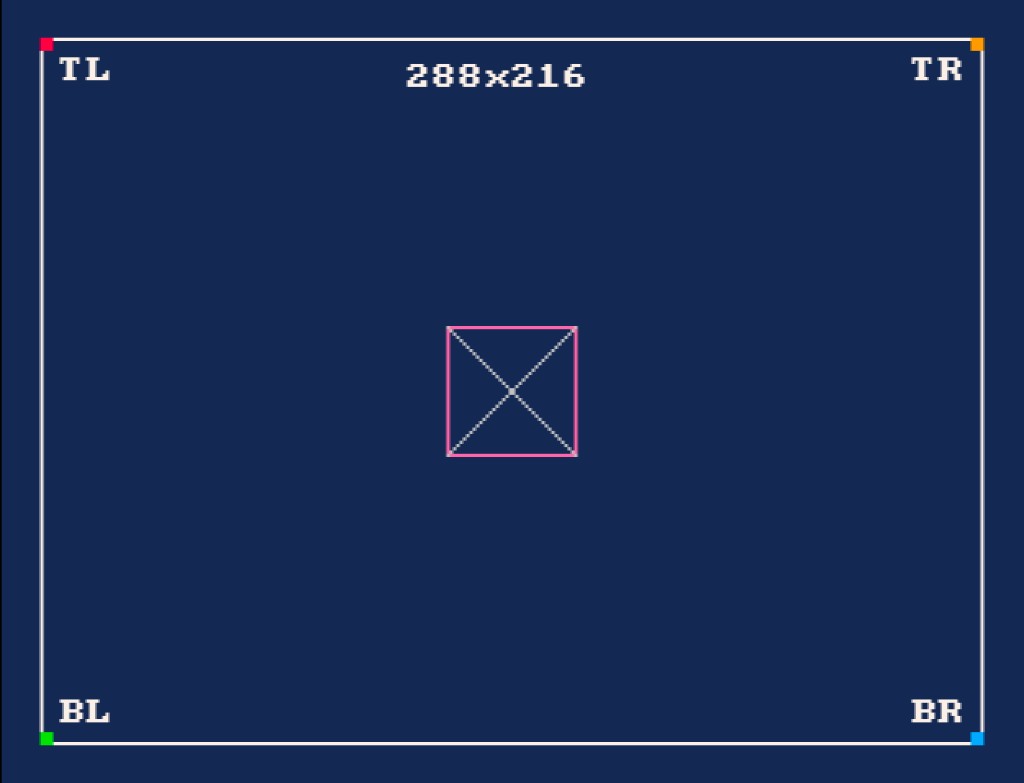
Windows
On Windows, install Git for Windows and run all commands from a Git Bash terminal. The same steps above apply - Git Bash provides the bash environment the build scripts require.
Linux Fallback
If the native bootstrap fails on your macOS host, ./build_examples.sh prints Linux fallback instructions and exits. Run the Linux fallback yourself:
docker run --rm --platform linux/arm64 \
  -v "$PWD:/workspace/gosprite64" \
  -v gosprite64-gomod:/go/pkg/mod \
  -v gosprite64-gobuild:/root/.cache/go-build \
  -v gosprite64-sdk:/root/sdk \
  -w /workspace/gosprite64 \
  golang:1.26-bookworm \
  bash ./scripts/dev-linux-build.sh
The generated *.z64 ROMs are written under examples/ and can be run with your emulator, for example ares. If you want to verify the square-pixel layout visually, start with examples/calibration/game.z64.